
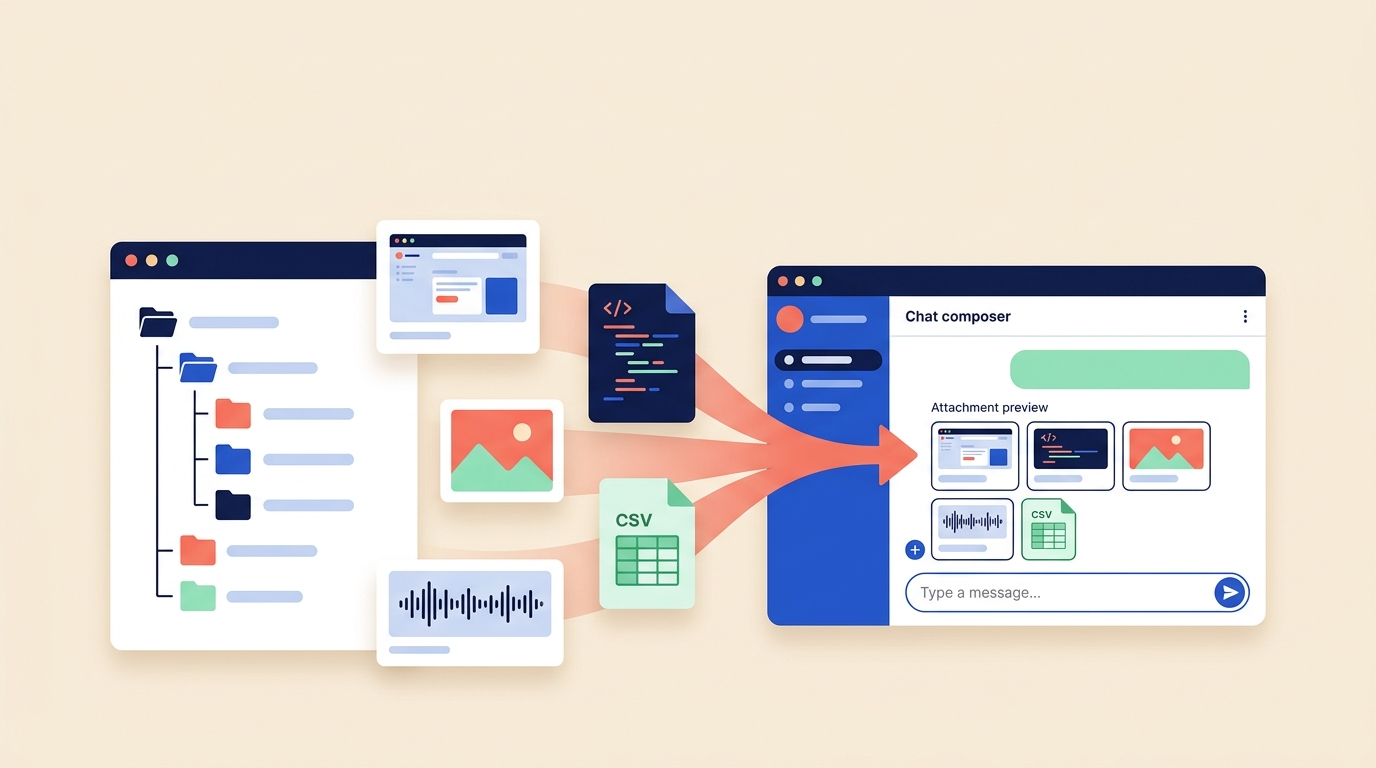
A screenshot can explain a layout bug faster than a paragraph. A log can show the failure that a vague error message hides. Tarsk’s expanded file workflows let you bring those materials into a project, attach them to a request, and review them before you send.
You choose the workflow that fits the job: copy a file into the project for ongoing work, attach it to one message, or do both at once.
Copy files into the project
Open Files from the chat dock. Drag one or more individual files from your file manager into the Files view.
Tarsk uses the drop location to choose the destination:
- Drop onto a folder to copy the files into that folder.
- Drop onto the rest of the Files view or the editor area to copy them into the repository root.
Tarsk asks you to confirm the copy. Select Copy to continue or Cancel to leave the project unchanged. After a successful operation, the file tree refreshes and shows the new files.
The project explorer gives Tarsk durable context for follow-up work. Copy a CSV into a data project, place a brand guide in a creative project, or add a reproduction image beside the code that renders it. Tarsk can inspect those files in later messages without asking you to find and attach them again.
The explorer accepts individual files, not folders. If you drop a folder, Tarsk skips it and tells you to drop the files inside. Tarsk also protects existing work: a copy with the same name does not overwrite the file already at the destination. Rename the incoming file or choose another folder when you see a conflict.
The project-copy workflow rejects empty files and files larger than 25,000,000 bytes. It does not restrict files by extension or MIME type, so you can copy the non-empty project materials your task requires.
Attach files to a chat message
Use a chat attachment when a file belongs with one request. In the composer, select +, then choose Attach File. Select one or more files in the file picker. Tarsk places the files in a pending attachment strip above the message field instead of sending them right away.
You can send an attachment with text, or send a file by itself. A short instruction still helps Tarsk focus the request. Try one of these prompts:
- “Find the layout problem shown in this screenshot.”
- “Read this log and identify the first failing step.”
- “Turn these meeting notes into an implementation checklist.”
The chat picker does not limit selection to a fixed extension list. The repository does not define a confirmed maximum size or attachment count for this chat path, so large files may still run into browser, request, provider, or model limits. Image handling also depends on the selected model. Tarsk warns you when the model cannot accept an attached image.
Drag files onto the composer
Dragging onto the composer combines project context with a focused message. Move one or more files over the main chat composer. Tarsk highlights the drop area and asks you to confirm the copy.
Choose Copy to place the files in the repository root. In the main chat composer, Tarsk then adds the files to the pending attachments for your next message. The complete flow looks like this:
- Drag files onto the composer.
- Confirm Copy.
- Check the attachments above the message field.
- Remove anything you do not want to send.
- Add your request and send the message.
This workflow copies files into the project before it attaches them to chat. If the copy succeeds but Tarsk cannot prepare an attachment, the files remain in the project and Tarsk reports that they were copied but not attached. A composer drop also requires a selected thread.
A drop onto the main composer targets the repository root. If you want a file in a specific folder, copy it through Files instead. The same rules apply to dropped folders, empty files, and name conflicts.
Review and manage previews
Pending attachments appear above the composer so you can check the message before sending. Tarsk shows:
- Image thumbnails with the filename
- Video and audio badges with the filename
- A paperclip badge for other file types
Each pending item has a remove control. Remove a file from the message without deleting a project copy that you created through the explorer or composer drop. You can also select the same local file again after removing it.
After you send the message, Tarsk displays its attachments beneath the message. Images appear inline. Recognized video files such as MP4, WebM, MOV, and AVI use video controls. Recognized audio files such as MP3, WAV, OGG, M4A, AAC, and FLAC use audio controls. Other attachments remain filename badges in the conversation.
You can manage attachments before sending by removing them from the composer. Sent-message previews do not offer controls to remove, rename, replace, or download the attachment. To manage a file that lives in the project, open Files, where you can browse, rename, delete, and edit project files.
Use the workflow that matches your task
Debug a visual issue
Drag a screenshot onto the composer, confirm the copy, and add the browser log with + → Attach File. Review both previews, then ask Tarsk to compare the visible symptom with the log and inspect the relevant project files. The screenshot gives Tarsk visual evidence while the log supplies the sequence of events.
Start a creative project
Copy a design brief, reference image, and content notes into a named folder in Files. Drop each individual file onto that folder and confirm the copy. Ask Tarsk to turn the materials into a page plan, content structure, or first draft. Keep the source files in the project when you expect several rounds of work, then attach one specific reference when a later request needs a narrow focus.
Analyze a data file
Copy the source CSV into the project so it remains available for follow-up analysis. Attach it to your first request and ask Tarsk to summarize its columns, flag missing values, or propose a transformation. Keep the original unchanged and ask Tarsk to write results to a separate file.
Review a media reference
Attach an image, audio clip, or video with a precise request. Remove unrelated files from the pending strip before sending. Use the project explorer when the reference should remain beside the work that uses it.
Give Tarsk the context it needs
Use Files when a file should become part of the project. Use Attach File when a file should travel with one message. Drag onto the main composer when you want both outcomes.
- Copy durable project materials into a clear folder.
- Review every pending preview before you send.
- Keep source files separate from generated results.
Open a Tarsk project, add the file that explains the work, and send a focused request. Start with the context you already have instead of rebuilding it in prose.