
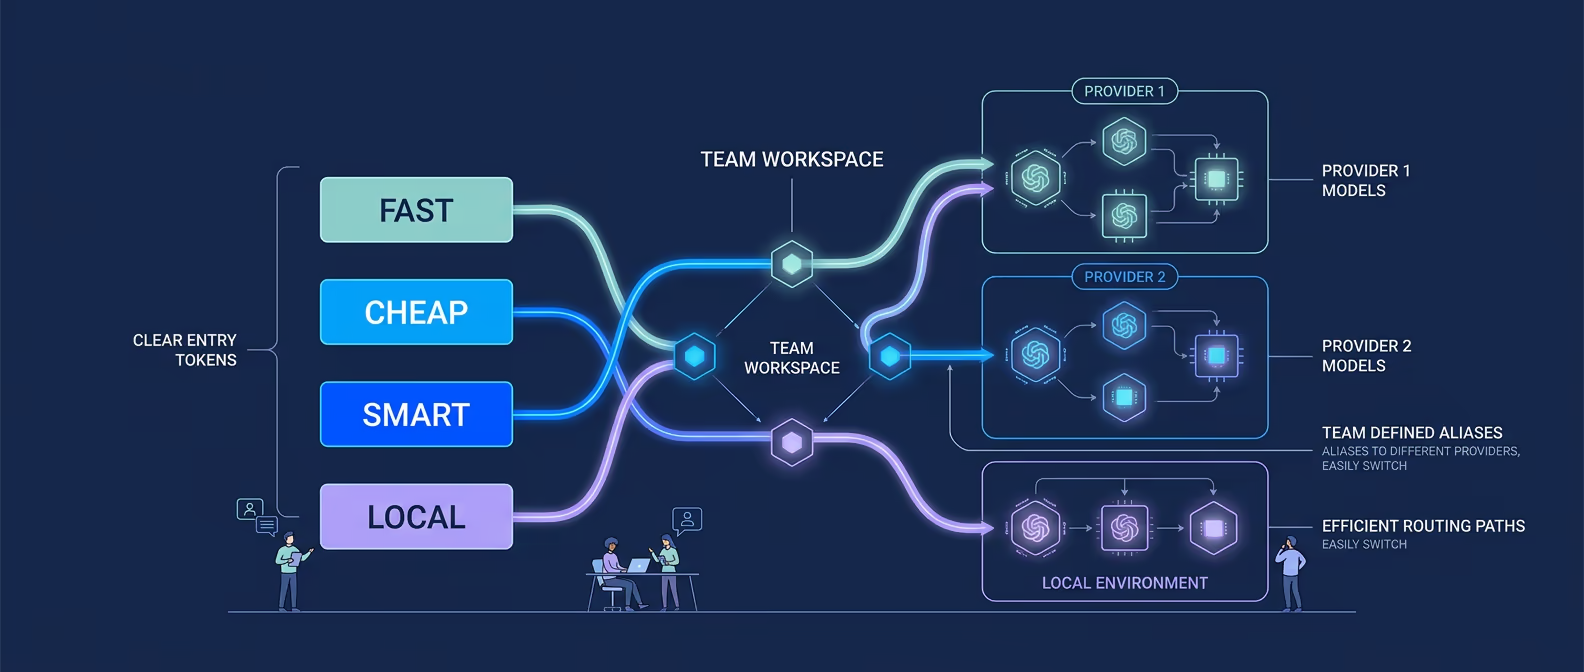
Model Aliases in Tarsk give your project four shared labels for model choice: fast, cheap, smart, and local. You map each label to an enabled provider and model, then reuse those labels in subagents so your team can switch providers without rewriting agent definitions.
If you build reusable agents across projects, this feature saves time fast. It also helps teams keep model choices consistent when cost, speed, privacy, or provider availability changes.
What problem this solves
Without aliases, teams tend to hard-code provider-specific models into shared agent definitions. That works until someone wants to move a reviewer from one provider to another, lower costs for routine tasks, or keep sensitive work on a local model.
Then the cleanup starts:
- update each agent by hand
- review old model names across projects
- figure out which agents still point at retired models
- explain the new naming choice to the rest of the team
Model Aliases give you a cleaner setup. Your team defines what fast, cheap, smart, and local mean for a project. Subagents can reference those names, and Tarsk resolves them to the current provider and model behind the scenes.
What Model Aliases are
Tarsk supports four built-in aliases:
fastfor quick responses and lightweight taskscheapfor lower-cost routine worksmartfor the strongest reasoning model in the projectlocalfor on-device or local inference
These names are fixed. You cannot create custom alias names today.
Each alias points to two things:
- a provider
- a model
That means fast is not just shorthand for one model ID. It can switch both the model and the provider.
For example, a project might define:
fast→ Google / Gemini 2.5 Flashcheap→ OpenAI / a lower-cost modelsmart→ Anthropic / Claude Sonnetlocal→ your local provider / your local model
Once you save that mapping, a subagent can stay focused on intent instead of vendor names.
---
name: code-reviewer
description: Review small code changes quickly
model: fast
---
That subagent now asks for the project’s fast model. If your team changes the fast model later, you update project settings once instead of editing the subagent.
Set up Model Aliases in Tarsk
You set aliases at the project level.
1. Enable the models you want to use
Tarsk only lets you assign aliases to models that are already enabled. If the model is not enabled, it will not appear in the alias selector.
That matters during setup. Start by enabling the providers and models your team actually wants available.
2. Open Project Settings
Open your project’s settings and go to the Advanced section.
You will see a Model Aliases area with one selector for each alias:
- Fast
- Local
- Cheap
- Smart
Each dropdown groups models by provider and includes an Unspecified option.
3. Assign each alias with intent
Pick the model that fits the job you want each alias to represent.
A practical first setup looks like this:
fastfor quick drafting, triage, and lightweight code reviewcheapfor repetitive or bulk taskssmartfor hard debugging, architecture, and higher-stakes worklocalfor privacy-sensitive tasks or local experiments
You do not need to fill all four. You can leave any alias unspecified.
4. Save the project
When you save, Tarsk validates the mapping. Each alias must point to an enabled model.
If someone disabled a target model before you saved, Tarsk will reject that alias selection until you choose another enabled model.
Use aliases in subagents
Model Aliases work best when you use them in shared subagents.
Instead of writing a provider-specific model into each agent, you can write the intent:
---
name: release-auditor
description: Check risky changes before release
model: smart
---
Or:
---
name: bulk-doc-updater
description: Make repetitive documentation edits across many files
model: cheap
---
This keeps the subagent readable. It also makes the same agent more portable across projects, because each project can decide what smart or cheap should point to.
How provider switching works
Provider switching is one of the main reasons to use Model Aliases.
Say your team has a code reviewer subagent set to model: fast. At first, fast points to one provider. A month later, you decide another provider gives you better speed or cost.
You can update the alias in project settings and leave the subagent alone.
That gives you two benefits:
- your agent definitions stay stable
- your team can switch providers without editing every shared agent file
This also works across providers, not just across models from the same vendor. A subagent can inherit a completely different provider when the alias changes.
Team conventions that work well
Model Aliases help most when your team treats them as shared contracts.
A few conventions make the feature much easier to live with.
Keep meanings stable
Pick one meaning for each alias and keep it steady.
Good example:
fastmeans low-latency workcheapmeans cost-sensitive worksmartmeans strongest reasoninglocalmeans work that should stay on local inference
Avoid changing those meanings every week. If fast means speed in one agent and quality in another, the label stops helping.
Write agents around intent
When you build reusable agents, describe the job first and pick the alias second.
Examples:
- a quick reviewer uses
fast - a batch content cleanup agent uses
cheap - a release gate or architecture reviewer uses
smart - a privacy-sensitive helper uses
local
That keeps agent behavior easier to understand when someone else opens the file later.
Review aliases when your provider mix changes
If your team disables models, changes budgets, or adds a new provider, review the alias mapping at the same time.
That avoids drift between what the team thinks smart means and what the project actually runs.
Setup guidance for real teams
If you are setting this up for the first time, start simple.
Recommended first-pass setup
Use this sequence:
- Enable only the models your team is willing to use.
- Assign
fastto the quickest good default. - Assign
cheapto the lowest-cost acceptable model. - Assign
smartto the strongest reasoning model you trust. - Assign
localonly if your team actually uses local inference. - Update shared subagents to use aliases where portability matters.
This gives you structure without forcing a big migration on day one.
Good places to use aliases first
Start with agents that your team reuses often:
- code reviewers
- bug triage agents
- documentation editors
- release checks
- architecture reviewers
These are the places where provider switching hurts the most if every agent hard-codes a different model.
Common pitfalls
A few issues come up often when teams start using Model Aliases.
Assuming aliases are free-form
They are not. Tarsk supports four fixed names today: fast, cheap, smart, and local.
Forgetting aliases are project-specific
Aliases live in project settings. The same subagent can behave differently across projects if each project maps aliases differently.
That is useful, but your team should expect it.
Assigning aliases before enabling models
You can only map an alias to an enabled model. Enable the model first, then assign the alias.
Losing track of fallback behavior
If a subagent references an alias that is missing or no longer valid at runtime, Tarsk falls back to the parent conversation’s model.
That keeps work moving, but it can hide configuration problems. If cost or model behavior looks off, check the project’s alias mapping and confirm the target model is still enabled.
Summary
Model Aliases give Tarsk projects a clean way to separate model intent from provider choice. You assign fast, cheap, smart, and local in project settings, then reuse those names in subagents that your team wants to keep portable.
Use them when you want to:
- switch providers without rewriting shared agents
- keep team conventions clear
- separate cost, speed, reasoning, and local-use cases
If your team already shares subagents, this is one of the simplest ways to make those agents easier to maintain. Open your project settings, define the four aliases you need, and update your most reused agents to reference them.